之前没有接触过NLP,所以不太理解里面的基本名词。所以这里学习一些NLP的基本概念。事先声明,以下大部分内容来源于第1章-自然语言处理基础概念和easyai的《非技术也能看懂的NLP入门科普》。不理解的地方我会加上自己的批注。
自然语言
自然语言是指汉语、英语、法语等人们日常使用的语言,是自然而然的随着人类社会发展演变而来的语言,区别于如程序设计的语言的人工语言。
语音和文字是构成语言的两个基本属性,语音是语言的物质外壳,文字则是记录语言的书写符号系统。
之前没有接触过NLP,所以不太理解里面的基本名词。所以这里学习一些NLP的基本概念。事先声明,以下大部分内容来源于第1章-自然语言处理基础概念和easyai的《非技术也能看懂的NLP入门科普》。不理解的地方我会加上自己的批注。
自然语言是指汉语、英语、法语等人们日常使用的语言,是自然而然的随着人类社会发展演变而来的语言,区别于如程序设计的语言的人工语言。
语音和文字是构成语言的两个基本属性,语音是语言的物质外壳,文字则是记录语言的书写符号系统。
Transformer由论文《Attention is All You Need》提出。学(烤)习(贝)一下。实现声明,本文大部分内容来源于Transformer模型详解(图解最完整版),对于不理解的地方,我会加上个人注解。
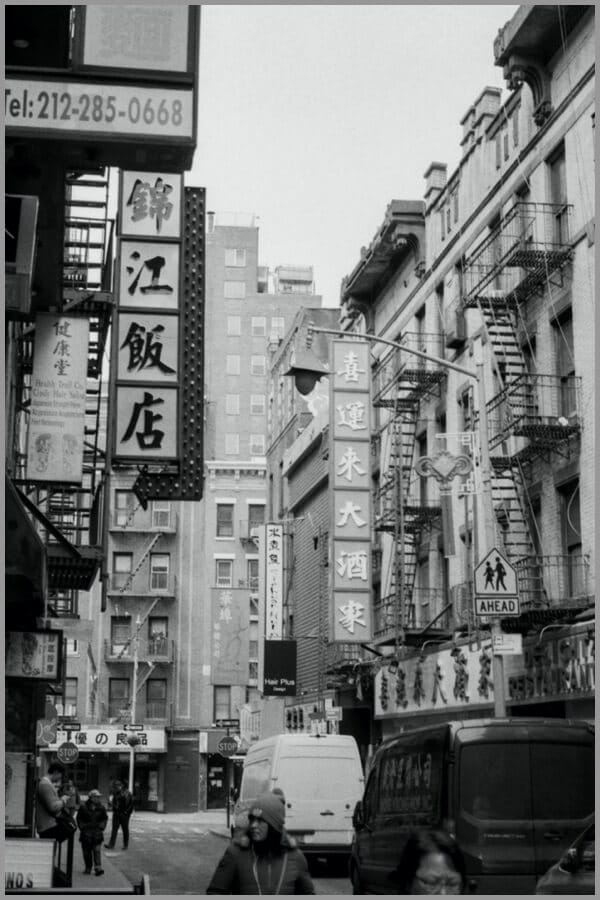
从“Attention”这个名字可以读出,Attention机制主要是对注意力的捕捉。Attention的原理与大脑处理信息有一些相似。比如看到下面这张图,短时间内大脑可能只对图片中的“锦江饭店”有印象,即注意力集中在了“锦江饭店”处。短时间内,大脑可能并没有注意到锦江饭店上面有一串电话号码,下面有几个行人,后面还有“喜运来大酒家”等信息。
事先声明,本文章大部分内容来源于理解TensorFlow的Queue,并添加个人理解。
Queue相关的概念只有三个:
Queue是TF队列和缓存机制的实现QueueRunner是TF中对操作Queue的线程的封装Coordinator是TF中用来协调线程运行的工具虽然它们经常同时出现,但这三样东西在TensorFlow里面是可以单独使用的,不妨先分开来看待。
事先声明,以下大部分内容来源于tensorflow 模型导出总结,并加上个人见解。
tensorflow 1.0 以及2.0 提供了多种不同的模型导出格式,例如说有checkpoint,SavedModel,Frozen GraphDef,Keras model(HDF5) 以及用于移动端,嵌入式的TFLite。
模型导出主要包含了:参数以及网络结构的导出,不同的导出格式可能是分别导出,或者是整合成一个独立的文件。
在tensorflow 1.0中,可以见下图,主要有三种主要的API:Keras、Estimator以及Legacy即最初的session模型,其中tf.Keras主要保存为HDF5,Estimator保存为SavedModel,而Lagacy主要保存的是Checkpoint,并且可以通过freeze_graph,将模型变量冻结,得到Frozen GradhDef的文件。这三种格式的模型,都可以通过TFLite Converter导出为 .tflite 的模型文件,用于安卓/ios/嵌入式设备的serving。
最近在搞二进制分析的东西,对于字符编码特别糊涂,所以学习了一下,本来觉得阮一峰的笔记挺好的,但是感觉又有点问题,所以我这里在自己总结一下,以下大部分内容还是来源于阮一峰的笔记。当然我自己总结的可能也不太对(知识有限呀),之后可以再修改。
计算机中,每一个二进制位(bit)有0和1两种状态,因此八个二进制位就可以组合出256种状态,这被称为一个字节(byte)。也就是说,一个字节一共可以用来表示256种不同的状态,每一个状态对应一个符号,就是256个符号,从00000000到11111111。
上个世纪60年代,美国制定了一套字符编码,对英语字符与二进制位之间的关系,做了统一规定。这被称为 ASCII 码,一直沿用至今。
ASCII 码一共规定了128个字符的编码,比如空格SPACE是32(二进制00100000),大写的字母A是65(二进制01000001)。这128个符号(包括32个不能打印出来的控制符号),只占用了一个字节的后面7位,最前面的一位统一规定为0。
之前一直知道Pytorch、numpy之类有好几种变换维度的方法,但是之前了解的不深,今天总结一下。
Pytorch在reshape的时候,是按照行存储的方式进行的。
1 | import torch |
众所周知,Pytorch存储模型主要有两种方式。
方式一:Save/Load state_dict (Recommended)
只保存权重:
1 | torch.save(model.state_dict(), PATH) |
由于Mac中使用homebrew安装的库都是最新的,有时需要老版本的软件,就很难办。
在工作中想用opencv3.3,但是使用brew安装的都是3.4,后来查到个方法,就是指定需要安装的opencv.rb文件
使用brew info opencv 可以看到:(最新的是3.4,我安装的是3.3)
1 | opencv: stable 3.4.0 (bottled) |
注意这篇文章来源于Pytorch中的仿射变换(affine_grid),感觉写的很好,所以转运过来了。
在看 pytorch 的 Spatial Transformer Network 教程 时,在 stn 层中的 affine_grid 与 grid_sample 函数上卡住了,不知道这两个函数该如何使用,经过一些实验终于搞清楚了其作用。
参考:详细解读 Spatial Transformer Networks (STN),该文章与李宏毅的课程一样,推荐听李老师的 STN 这一课,讲的比较清楚;
假设我们有这么一张图片:
/5798456-5285414fb5239b43-163780950525713.png)